This is the official bitalino website
Materials and equipment
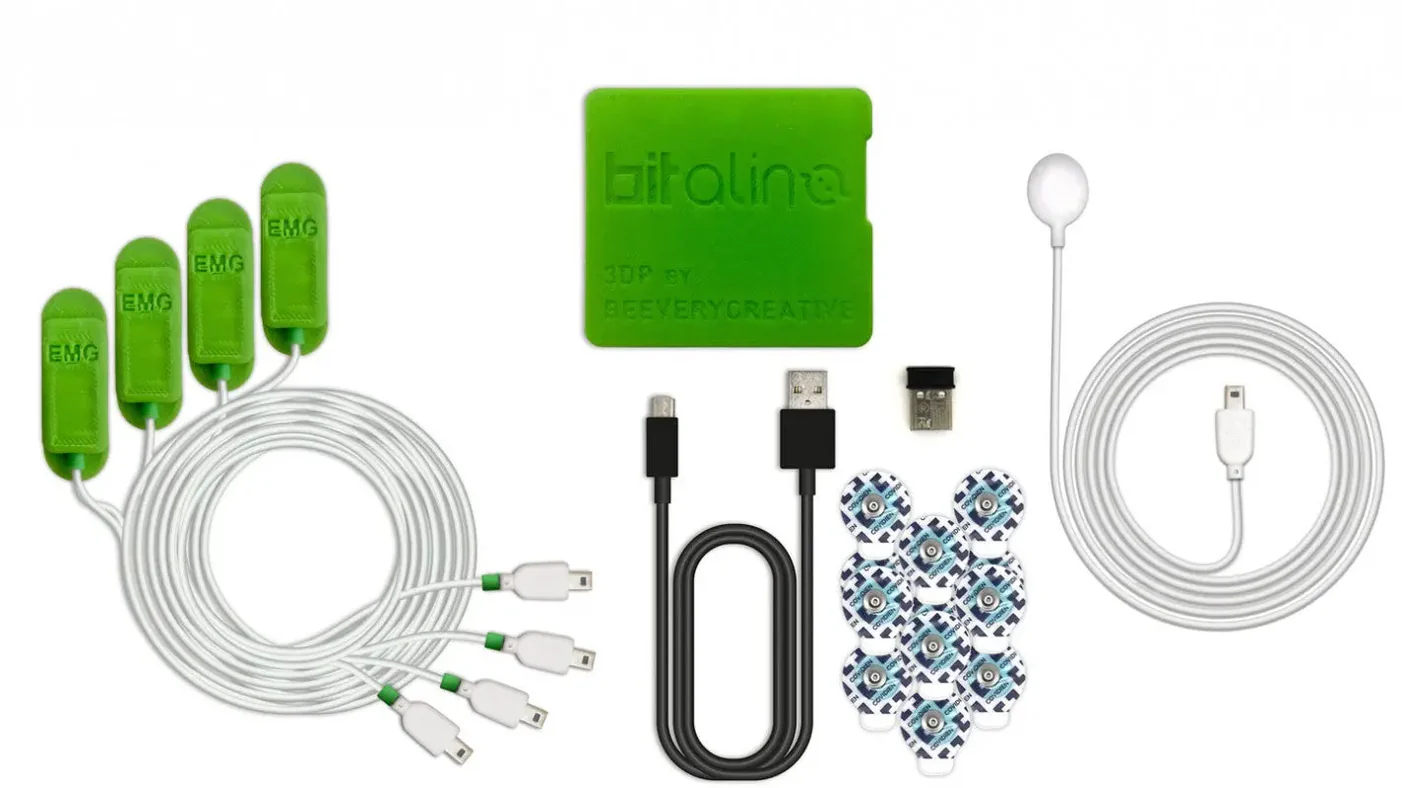
- BITalino Core BT (MCU+BT+PWR): This is the main board that enables real-time data streaming. Details of the board can be found here, including a figure of all relevant functional blocks and components.
- 1500mah 3.7v battery.
- EMG Sensors: Sensors specifically built for muscle activity measurement
- BITalino Sensor Cable (100 cm): Connects the EMG sensors to the main board.
- 3-Lead Electrode Cable: Used to connect the EMG sensors to the electrodes.
- Disposable Ag/AgCl Electrodes*: Standard pre-gelled, self-adhesive disposable electrodes.
- 3D Printed Casings: Casings for the circuit board and sensors protect the components and ensure their longevity.
Method
Before acquiring signals, please check out the bitalino quickstart guide.
Step 1. Begin by downloading the opensignals software using this link. for more information about the software, the software’s data sheet can be found here.
Step 2. Connect the 3.7v battery to the main circuit board, and turn on the power.
Step 3. Open the opensignals software. connect your computer with the main circuit board via bluetooth.
Enter the password pin: “1234” on your computer to enable bluetooth connection (see pg. 18 in the user manual).click the gui symbol on the bottom that allows “find and configure your devices”.
Step 4. On this main circuit board, there are 6 available channels (see the back of the main board). select the number and the type of channels that you’d like to use (e.g. a1&a2/emg) and disable all the other channels by clicking on/deselecting the blue dots. note that the blue-colored “enabled” means the system is already active, no need to click on the “enabled” to activate the system.
Step 5. Clicking the gui symbol at the bottom for “change opensignals setting” will allow you to save your future recordings in different file formats (.txt, .h5, and .edf). you may choose to select all, although .txt files are enough for signal filtering and processing on python or matlab. another important option is to choose the desired location to save your recording files. for more information, see the software’s file formats description.
Step 6. Prepare your recording electrodes by connecting the sensor cable(s), the emg sensor(s), and the 3-lead electrodes together.
Note the plugged-in channel number needs to match the number of the sensor you chose on opensignals at step #4.
Important: the EMG sensor has two sides of outputs with distinct connections- the socket with “a1”,”avcc”, “ref”, “gnd” should be connected to the cable that leads to the main board, and the socket with “in-”, “ref”, and “in+” and the word EMG on the side should connect to the 3-lead recording electrode. if this is done incorrectly the bipolar recording system will not work.
Step 7. Attach the gelled self-adhesive disposable ag/agcl onto the electrodes, and place them accordingly on the desired muscle to record. the middle electrode is the reference/ground electrode.
Step 8. Click the red recording button to begin data acquisition.
When you are done, you can click “start the file viewer on the current file” to view the recording. you may review the video for the software’s built-in features for extracting a report of the data.
The data are now stored in your pre-defined location and ready for further processing.
Common issues and troubleshooting
Bluetooth connection: sometimes, a bluetooth related error message will appear. when this happens, it is most useful to turn off, or even reset (by deleting) the bitalino bluetooth connection altogether on your computer’s bluetooth setting and re-start the software by entering the bluetooth password pin once again. see page 185 in the user manual for a comprehensive error list. there is also a guide specifically for bluetooth troubleshooting.
([Photo] by PLUX biosignals official website) [photo]: https://www.pluxbiosignals.com/
Additional resources
Opensignals (r)evolution (v.2019) user manual bitalino (r)evolution sensors tour: this video presents an overview of the default sensor blocks included in every bitalino (r)evolution kit. Opensignals (r)evolution (v.2019) user manual: https://bitalino.com/storage/uploads/media/opensignals-manual.pdf Bitalino (r)evolution sensors tour: https://www.youtube.com/watch?v=lofutnegrv4&ab_channel=bitalinoworld
